Started to cover the front and added the mouth and teeth in. Pricked my fingers countless times getting the needles through the paper mache which is harder than it looks.... so far i like how its going
Thursday, December 29, 2011
Evil Deadmau5
Ok so i managed after 2 weeks of work to finish the deadmau5 head! Got it shaped carved threaded and formed! all thats left is to cover the front with fabric, add the mouth and teeth!
Saturday, December 17, 2011
MOAR KISS paintings
my dad decided he wanted another painting to go with the one i made for his office... this time an album cover and out of ALLLLLLLLLLL the possibilities he had... he had to pick Destroyer...
The art on the cover is amazing in my opinion... its just i have no experience at all on drawing full body people. The first thing i had to do was sketch an idea of how i was going to place them on the canvas.. The cover is in a square shape like how many Vinyl records are. The canvas is a rectangle... took some time to get the size right but i figured it out. somehow the image got flipped... great.
After that i cut out the shape and traced it on the canvas to fill with the details. After that i started to do a basic black coat on the group to see how many layers of paint i would need. luckily only2 layers of black were needed to get the right color. Drawing the scale pattern on Gene Simmons boots was a real pain to get right...
Once that was done i began to sketch the rocky base theyre jumping off. That was also given a black base coat to get the shadow.
After that, i began painting the brown and trying to get the colors right on the costumes. The details on all of them were a pain to paint on but the outcome was fantastic.
Once that was started the background needed to be done... a hard lesson learned, never use watercolor on canvas... it just looks bad
and now here i stand, fixed the watercolor mess and just trying to get it done... On the bright side i started the Deadmau5 head again to try and do it right.. Wish me luck on both! also thinking of making a facebook page... let me know what you guys think yes or no
Monday, November 28, 2011
KISS Painting
This started off as a project to distract me from the horrible Deadmau helmet failure and slowly transformed into a project of its own! my dad liked it and wanted it for his office...
Over time i began to learn that the more i sketched out the faces and more color i added the better it got. The last face i needed was Gene Simmons... i originally didnt make a sketch so i had to wing it and use a rough draft as the final copy and im pleased with the results
Once i got that done my dad suggested adding symbols on the corners and the KISS logo in the center. After some research on the web i found some images of the symbols and sketched them on and did a test layer of the placement.
Once he OK'd the design i began to darken everything and i decided to do a flame color for the KISS logo in the center. In the end i was happy on how it came out and he was happy. thanks for looking!
Monday, November 21, 2011
More Side Projetcs
A friend of mine ant me to make him a zelda shield and a KISS painting for my dad. Today i spent 3 hours on both and im glad on how far i got. enjoy!
Friday, November 11, 2011
Arc Reactor
kind of a delayed post but i finally found some free time to update! For Halloween this year i decided to be Tony Stark from Iron Man, tho i didnt have enough time to grow out the beard, i got pretty close where people could recognize me without the Arc Reactor. I wish i had taken progress pictures but i made it in only 4 days in my garage with a box of scraps... The copper wire spools are made of well.. spools. The outer ring is hot glue sticks shaped to the form of a ring. The inner ring is made out of epoxy sculpt and the base is a ÇD to give it a reflective look. The light is a single really bright LED hot glued to the center.
\
In the end i was pleased with how it came out and i will make another one just
for me. My friend bought this one from me after Halloween was over and asked for a stand to go along with it.
DeadMau5 Head
So after getting tired of painting I decided i needed to make another prop, in this case the iconic Deadmau5 head worn by Joel Thomas Zimmerman. The head is basicaslly a giant mouse head with white eyes and a big smile. Im still poor and a lack of funds im going with the Paper Mache route many have taken. Updated soon!


Finally got started on the project. I created a paper mache sphere with an old beach ball which unfortunately popped but luckily it was after the mache had dried so i was lucky with that. Heres a reference shot and i know yes the sphere is not size accurate.


unfortunately here in california the weather took a turn for the worst and it started to rain horribly and getting to 60 degrees which has a huge effect on paper mache so basically the head collapsed after i cut it out but i managed to salvage the ears... gotta start over again hopefully the weather gets better.
Holiday Painting, Jack & Sally
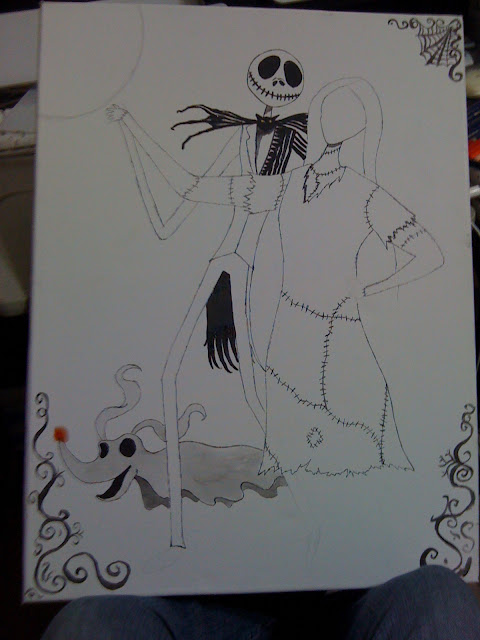
Recently i got a commission from my friend to make a painting for her aunt who is a huge Nightmare before christmas fan. Her idea was to have Jack and Sally with Zero together on a canvass. I had an extra canvass lying around and decided to take the job! i goofed off for a while which is a no no on my part, but i got pretty far in 2 days of work. Here are some pictures of where im at.
The tricky part was at the time i was completely out of acrylic color paints except white. I decided to improvise and use some water color pencils i had lying around. The effect came out well and they loved the look. Still need to add the hill on the side and finish Sallys face.
Finished painting! minor details needed
Thursday, November 3, 2011
Hover board
recently I was asked to help with something to add to our School yearbook, some sort of picture to make things different. Here is what i gave them! a Hover Board. I wish i had taken progress pictures but it was a tight schedule. the base is made of MDF wood and tinted window pannel as the 2nd layer. The yellow is construction paper and the red and green are painted on. Enjoy!
Sunday, October 2, 2011
Monday, September 12, 2011
Stencil vinyl records
Ok so to help make money in these tough times, ive started doing stencil designs on vinyl records to help try and pay for the materials to start my Bioshock infinite Song bird costume. For those unfamiliar with Songbird, here is a picture of what he looks like.
To help create this monster ive started selling Vinyl Lp's for $5 of a design ive created or $7 for any design you want. if interested please leave a comment with the design you want or a suggestion. Here are some of the designs i have available at the moment
3 new designs added... ill try and update the website atleast every 2 weeks if i can thanks for being patient.
Tuesday, September 6, 2011
Masks repainting
A week ago i got a pair of masks at a swap meet. Im not exactly sure of the origin of them but if anybody can tell, please leave a comment to help me out. When i bought these masks they were in decent shape but had alot of scratches, chipped paint and a broken tooth. You can see the scratches and faded paint on the one on the left. The one on the right i decided to just leave it as it is.
I started with the teeth and gave them a fresh coat of white paint. Next came the red all around the mask. Due to my limited supply i had to spray paint some gold into a little cup and use that for the details.
The mask completely painted. I decided to not fix the broken tooth because it helps give character to the mask. The red and Gold were kept as close to the original color as I could but im proud of how it came out.
Monday, August 1, 2011
little side project
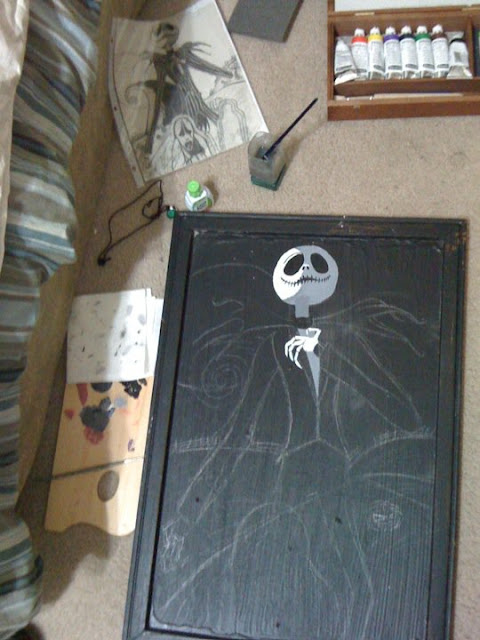
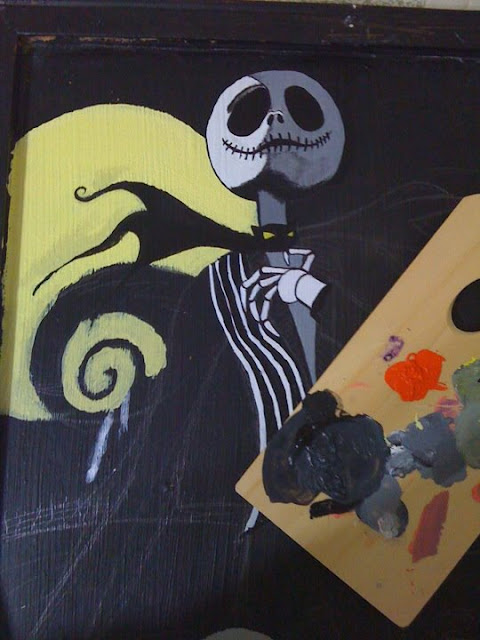
one of my drawings i did way back of Jack Skellington from Tim Burton's "Nightmare Before Christmas". i decided to paint it and have something to hang on my wall. For now ive sketched it out and started to paint some of it. enjoy for now!
Sorry about the slow updates... ive been busy rattling my mind at how im gonna do my next project for a cosplay contest. Here are some more pics of the painting so far enjoy!
couple details left and its finally done. I decided to give the original to a close family friend and started another one for me to keep in a glass frame to keep for my portfolio.
Subscribe to:
Comments (Atom)


